
Hi girls
Here is a new challange for August. As usual we always try to give you a fun time scrapping.
This month's RAK is the following:
1 - Create a page with products from both of us (either Maria's, mine or both).
2 - Use the newest tutorial by me (scroll down or visit this tuto at DDR here).
3 - The page should have at least 2 different sized photos + title and date.
THEME for THIS MONTH: As it's DDR's birthday I thought we could fill the gallery with birthday pages (can be an old birthday party, a recent one, from yourself, parents, sons and daughters, grandchildren, siblings, a friend, just focus on a special birthday in your life to follow the theme.)
REGISTRATION: Reply here until the 20th August to participate
DEADLINE FOR POSTING: 31st August
WINNERS: On the 2nd September we will announce the winners. There will be 2 winners chosen randomly.
PRIZE: The 1st winner will be able to choose from any of my kits at the store for the value of $7.50. The 2nd Winner will receive a $5.00 Coupon to use at Silke's Store.
POSTING: Home » Cocktail Hour (Challenges) » Designer's Raks
PARTICIPATION GIFT SURPRISE TO ALL PARTICIPANTS
Maria Designs here
Silke Papierstudio here
Tutorial
Creating and Shadowing a Bend Photo Effect
Technique for Designers and Scrappers: Selection, Warp tool, Layer Effects, Clipping Mask.
By Papierstudio Silke

When you create a layout - and you intend to simulate staples of photos, you may want to create this realistic bend effect with the corresponding shadows. See this sample:
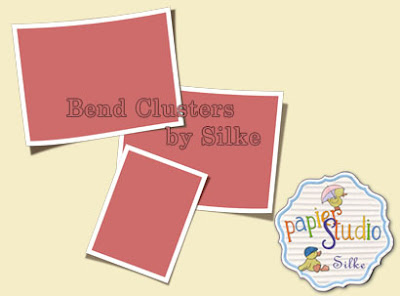
this product will be in my store soon!
The shadows and how to turn them into convex or concave shapes without image distorting is very important.
I use PS CS3 and first of all, I will show you here how to achieve this effect in this program (CS2 and newer versions can take advantage of this tutorial also). At the end of this post, you will find some tips and tricks for other programs also.
So. let's start this step by step in Adobe Photoshop CS3:
1st Step
Open a Photo and make a retangular selection - smaller than your orignal photo - and create a new layer under your photo layer and fill this selection with any color of your choice.

2nd Step:
Go to Edit > transform > warp and change the shape to a convex or concave image format by dargging the little solid dots represent handles that will modify the courves.
Any of the lines (paths, splines) or anchors can be dragged to where you want them. 
3rd Step (OPTIONAL - using manual shadowing)
Now we can add shadow manually by selecting the shape and creating a layer below and filling with a dark brown (not black) color. I think that dark brown shadows are more realistic than pure black.
And now you have to blur - filter >blur> gaussian blur> and set it between 4 and 14 depending on the image size you are using. Go directly to step 6.
4th Step - using DROP SHADOW
hit with the right mouse button on the layer palette, and open the Drop Shadow menu.
Choose the settings that you most like, or use mine here below, but remember that these settings can vary - depending on the image size you are using. 
5th Step - create a new layer from the layer effect (fx icon)
right click on the little fx icon in the layer palette and hit the option CREATE LAYER.
Skip this step if you did the step 3.
6th Step
Edit > transform > rotate this layer 180º
7th Step
Let's go again to edit> transform> warp and drag the lines and dots in order to hide the unwanted edges.
8th Step
Now we are going to clip our photo to this concave/ convex shape. Click with your right mouse button on the photo layer and choose from the menu the create clipping mask option. (or hit CTRL +Alt+G)
If needed, adjust the size of your shape to the photo size. 9th Step: adding a Border to your Photo.
To add a border, simple choose the Stroke effect from the layer effect options (fx icon in the layer palette. Here is the end result:
 Tip - for other program users:
use the pen tool to create a concave or convex shape form.
Make a rectangle shape and use the direct selection tool to edit the curves and edges.
Duplicate, rotate and use Gaussian Blur (values around 8) to create the shadow layer.
See here below a step by step for different programs from PS CS.
I have a new product - Bend and Paint - visit my store! (see links at the side bar)
Happy Scrappings! Have a nice week and visit our monthly RAK - where you can win a kit from Maria Designs or a Discount Coupon to my store.
Silke
Um comentário:
Sou assinante do seu blog e só hj vi que vc é uma brasileira...pq vc não escreve em portugues?
Ou tem a opção português?
Como por exemplo êsse tutorial?
Aguardo sua resposta meu email:
mary.branco@hotmail.com
Postar um comentário