Hi, my dear readers. Today the post will be in English. (please, forgive my bad English. I'm fluent in German and Portuguese, but still learning English!)
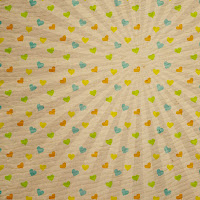
The actual trend is to create lightning effects at the paper, like sunbrust. Here I'll show you how to create a brush, that you can use over and over again in your layouts!
First of all, open a new document, 2500 x 2500 pixels and fill with black and white gradient.
 2- Now you choose Filter> Distort > Wave with the settings here below:
3- your actual document will look like this here below:

4- Now we go back to FILTER effects, and choose Filter > Distort > Shear

and the final image is here:
 5- Creating the Brush:
Go to Edit > define brush preset... and name it "my sunburst".
6- Open your paper (3600 x 3600) and apply the brush in a new layer. If you wish so, you can resize the brush to 3600 pixels to fit your paper. Modify the blend mode and the opacity, until you are happy with the results.
Look here my sample paper:

To commemorate the NSD, I have a commercial use freebie for you:
And here is the You Tube Tip to this tutorial:
***** Happy Scrap!!! *****


13 comentários:
Thank you! Your blog post will be advertised on the DigiFree Digital Scrapbooking Freebie search engine today (look for timestamp: 27 Apr [LA 07:00pm, NY 09:00pm] - 28 Apr [UK 02:00am, OZ 12:00pm] ).
Great tutorial! Your English is good! TFS :)
Fantastic tutorial! I'm always thrilled when I learn something new in PS! :)
great tutorial! thanks so much!!!
Thank you so much for this Freebie. I want to let you know that I posted a link to your blog in Creative Busy Hands Scrapbook Freebies Search List, under the Commercial Use post on Apr. 28, 2009. Thanks again.
Thank you so much!
Cool tutorial - you link to mglscrap blog is working too so you are in the runnung! :)
Cool tut, thanks!!
Muito obrigada!!!!...adorei o tutorial e o freebie!
thank you for haring this great tutorial!
Lindona da minha vida.. adorei o tuto! obrigada pelo freebie..
bjs
Thank you foer the tutorial, much appreciated
Hehehe adorei, lindinhoos, bjos
Postar um comentário