This is a really crazy weekend, with so many to do lists all over the web because of the Digital Scrapbooking Day. Some of you asked for it and I decided to put the tutorial on how to add color to templates here on my blog for you!!
The secret on how to create an unique effect when coloring the element templates!
Você quer o tutorial em português? Deixe um comentário, que eu já providencio a tradução!!
Today I decided to show a short way to add some effects that can bring life into your template designs There are many designers selling templates. You only need to add your colours. But, in order to let them become life, it is important to give them a third dimension with a very unique and special touch!
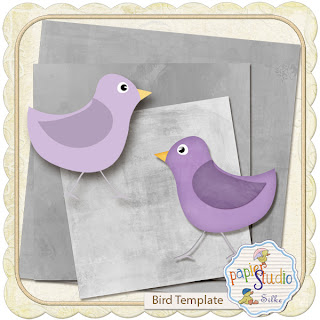
The example here of the template is a bird. You can download it and start the tutorial with it. Change colors in order to get different effects! 4 Bird samples are included and also the tutorial. Please leave a comment for me, I love it!!
Download expired
I discovered this technique with a fabulous template designer, Just Creations, on her tutorial blog. She has wonderful tutorials and templates! Visit her store or tutorial blog.
Open your template in Photoshop (other programs may have similar tools).
Go to the bird layers and set the inner shadow with a coordinating color as the layer style for each one.
(click on the images to zoom the image)
1- bird beak:
2- bird eye:
Contour:
4- bird body:
Now you need to add drop shadow to the wings. So again, go the wing layer and set the inner shadow and then the drop shadow.
5- bird wings:
inner shadow
drop shadow
So, this is the essential work. Now let us be creative and give this bird a customised touch!
You can use any painting technique. I have some tutorials here on my blog.
But this time my tip for you here is a very simple solution, with an effective beautiful and interesting result:
Painted paper overlays and texture overlays! Here are 3 painted overlays that I created with my SoftArt action and then desaturated in order to have them in a light gray:
Here is the preview of my layers with the overlay as color burn blend mode. Put the overlays one layer above each bird's part and create a clipping mask with this blending mode.
Use your creativity to move, rotate, duplicate, modify blendings of these overlays! Finally you can add a texture. (not shown here). But remember to add different effects to each layer, this help to let your work more eye catching!!
Você quer o tutorial em português? Deixe um comentário, que eu já providencio a tradução!!
Happy Scrappings!
Silke


3 comentários:
I use Paint Shop Pro. Thank you for your tutorial. It took just a little bit, but I was able to figure out how to use your tutorial for PSP. Now I can use the templates I've collected. Thank you again!
Thank you for the wonderful kit and tutorial! Happy DSD.
Hugs,
hiii download link is not valid plz give us correct link
:)
Postar um comentário